Datadog is a powerful monitoring and security platform that gives you visibility into end-to-end traces, application metrics, logs, and infrastructure. While Datadog has great documentation on their Kubernetes integration, we've observed that there's some missed nuance that leads to common pitfalls.
This blog post will guide you through how to install the Datadog agent on Kubernetes and enable additional features such as DogStatsD and APM via Helm and Porter while avoiding these common pitfalls:
- Not running the Datadog Daemonset on all nodes
- Not adding admission label to your application pods you'd like to use DogStatsD and APM with.
- Overriding environment variables that have been injected by the agent
- Not setting resource limits on the agent to avoid crashing the node/kubelet
Basic Installation
We will use Helm to install the Datadog agent with the default set of values. The default values in Datadog's helm chart, along with Datadog's Autodiscovery feature, is sufficient to give visibility into all cluster level metrics.
These are the commands to install the Datadog agent in your cluster using Helm v3 with the default values. Make sure to copy your API key from Datadog dashboard in the install command.
Common Pitfall #1: Daemonset not running on all nodes
The Datadog agent is installed as a Daemonset. This means that the agent is designed to run on every node of your Kubernetes cluster. By default, the Datadog agent will assume that none of your nodes has a taint. If you've added taints to some of your nodes, the agent will run and ingest data only on the nodes that do not have taints.
Enabling DogStatsD and APM
To automatically inject these environment variables into your pods, you need to enable the Datadog admission controller. You can do this by modifying these values on the Datadog Helm chart.
Common Pitfall #2: Not adding the admission label to your pods
You can verify that the environment variable has been injected to the pod by running the following command:
If the admission controller is working as expected, you'll see the IP address of the node that the pod is running on. You can confirm this by running:
Common Pitfall #3: Overriding the injected environment variable
Now that you have the admission controller working, modify the following values on the Helm chart to enable DogStatsD and APM:
Common Pitfall #4: Not setting resource limits on the agent
The default set of values on Datadog do not have any limits set on the resources it can consume. This may result in a node or kubelet crash if the agent consumes more resources than what its host node can accommodate. The resource limit you should set depends on the size of your nodes and the operations you are performing on the agent. There are many places that these resource limits can be set, but we've found that in most cases the agent pod itself is the primary consumer of resources. You can set the limits on the agents with the following values:
Then run the install command again with the values above. You can check from your Datadog dashboard whether custom metrics and application traces are being received properly.
Summary
Installing via Porter
Porter is a platform as a service (PaaS) that runs in your own cloud, specifically in your own Kubernetes cluster. On Porter, you can install the Datadog agent as a one click add-on and enable DogStatsD, APM, and logging by a simple toggle.
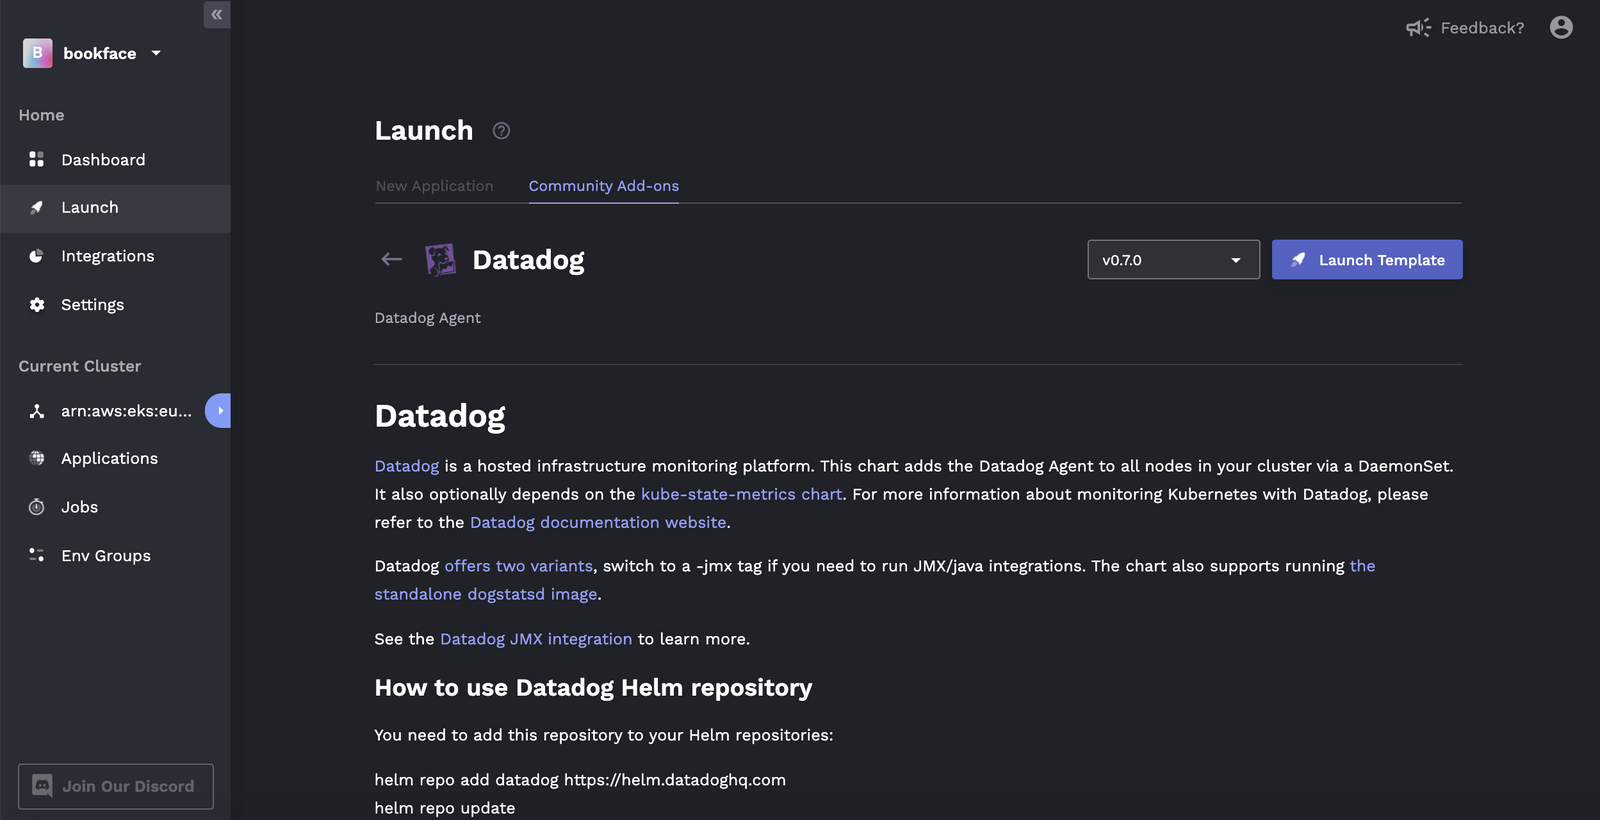
1. Navigate to the launch tab and select the Datadog add-on.

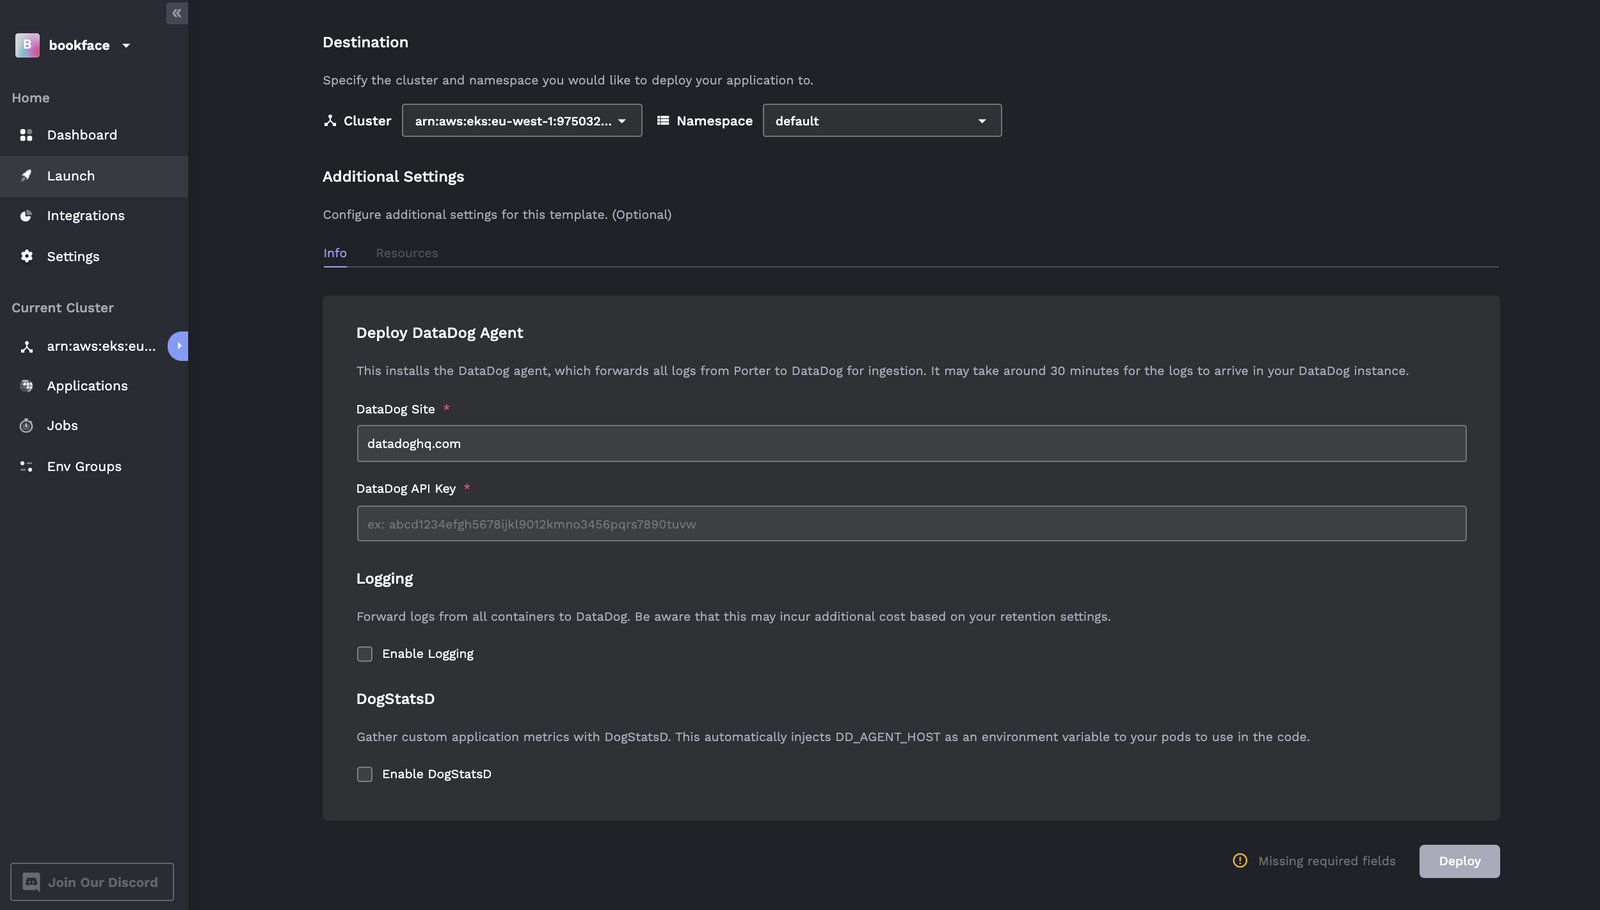
2. Put in your ingestion key, toggle the features you'd like to use, then hit deploy!

Next Up


